Contents
- 1
- 2 Solar Panel for Van
- 2.1 Complete RV Solar System with Batteries
- 2.2 System planning and sizing of RV solar system
- 2.3 Battery Bank for solar panel:
- 2.4 Choose the solar battery bank
- 2.5 The use of inverters in solar panels:
- 2.6 Wiring of RV solar panel system:
- 2.7 Monitoring and controlling of RV solar panel system:
- 2.8 Install and maintain of RV solar panel system:
- 2.9 Safety Precautions of RV solar system :
- 2.10 RV solar Charging System components:
- 2.11 Components of Solar System:
- 2.12 Pros:
- 2.13 Cons:
- 2.14 FAQ
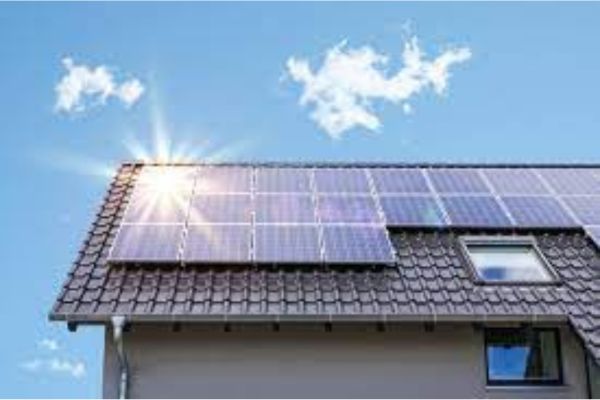
Solar Panel for Van

Complete RV Solar System with Batteries
A solar panel is made up of individual solar cells and small devices that can convert sunlight to energy. complete RV Solar panels system with batteries convert the sun’s energy into direct current (DC) electricity and this charges your RV’s batteries storing the electricity and this charges your RV’s batteries storing the electricity. When many panels are joined together you have a solar array.
System planning and sizing of RV solar system
- Energy needs Assessment: Determine the appliances and devices you plan to power with solar energy, their wattage, and the number of hours you intend to use them.
- Location and sunlight: Consider where you will be using your RV Solar panel efficiency depends on the amount of sunlight available. if you will be in a sunny region you may need fewer panels. if you’re in a place with less sunlight you may need more.
- Solar panel selection: Choose the type of solar panel you want ( monocrystalline, polycrystalline, or thin film). Monocrystalline panels are most space efficient for RVs.
- Battery Capacity: Decide on your battery bank capacity. Batteries store excess energy generated by the solar panel for use during cloudy days at night
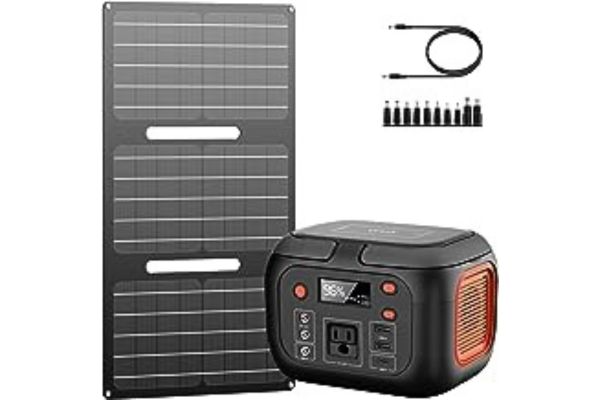
- Inverter sizing: Determine the size of your inverter which converts DC power from the solar panels and batteries into AC power of your appliance
- Change Controller: Select an appropriate charge controller to regulate the energy flow from the panels to the batteries. it should match the voltage of your panels and batteries.
- Solar panel Sizing: calculate the number of solar panels required. to do this divide your daily energy consumption by the average daily sun hours at your location
- Wiring and installation: Ensure the wiring and installation are done correctly.
- Monitoring system: Consider installing a monitoring system keep track of your solar system performance and battery levels
- Budget: Keep in mind your budget. Solar setups can vary greatly in cost.
- Consider future needs: Plan for possible future energy needs. if you anticipate adding more appliance or expanding your RV system leave room for scalability
.The basic parts of a complete RV solar Panel with batteries setup are
- Solar panel
- Charge control
- Batteries
- Inverter
- charger
- Battery Isolator
- Busbar
- Battery monitor
- Shunt
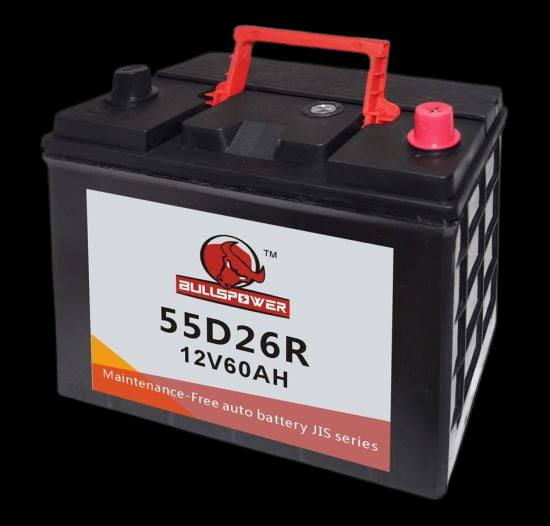
Battery Bank for solar panel:
. You can then use that stored energy to power your home at times when your solar panel doesn’t generate enough electricity including nights cloudy nights and during power outages. The cost of the solar bank is around 800 dollars to 1,000 per kWh of battery capacity. For example: Tesla’s power wall has an energy storage capacity of 13.5kWh and it sells for around 11,500 dollars.
Choose the solar battery bank
- Lifespan and charge/ Discharge cycle
- peak power output
- Round-trip efficiency
- Ambient working temperature
- Brand & warranty
- Cost
Size of battery bank for Solar Panel :
 You may want to consider 600-800 amp hours of capacity, based on this example depending on your budget and other factors. Battery banks are typically wired for 12 volts,24 volts, or 48 volts depending on the size system. If you live in a remote isolated area without a central utility grid you will need a battery storage device to capture your solar generation for use later. This is essential if you want to have the lights on at night when your system is not generating
The use of inverters in solar panels:
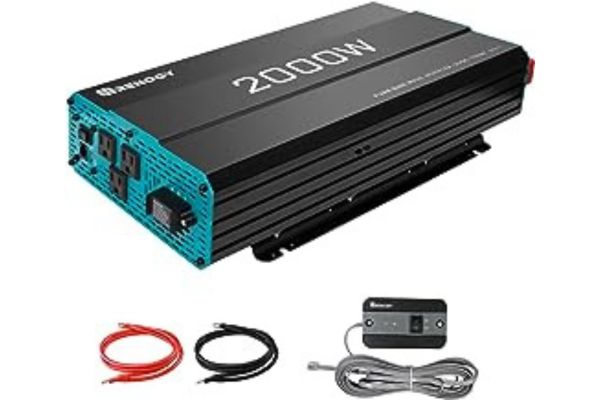
Working of inverter
A solar inverter works by talking in the variable direct current or DC output from your solar panels and transforming or AC output. The appliances in your home run on AC, not DC which is why solar inverter must change the DC output that is collected by your solar panels. At night the solar inverter will turn itself off one cannot read the display or any other information before the sun comes up.
Charge controller of RV solar panel system
The solar charge controller is an essential part of any solar-powered RV. By avoiding overcharging, the controller extends the battery’s life. The controller replenishes your battery banks by allowing the full flow of current from your solar panels when your batteries are low. You will receive the controller’s maximum output amps as a result. The controller is set at about two-thirds of its rated output if you do not want to squander any heat size output.
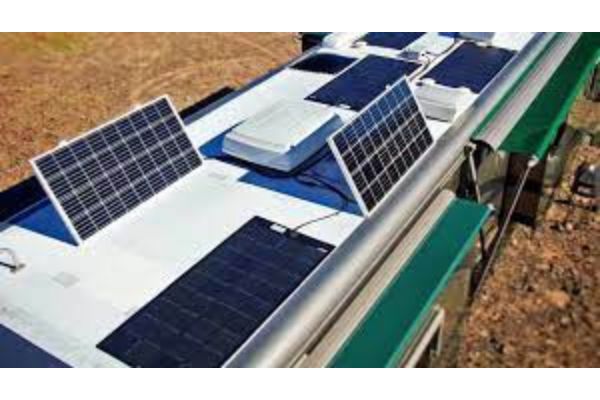
Wiring of RV solar panel system:
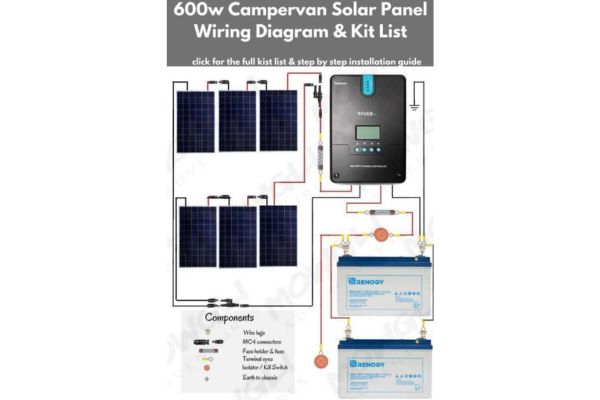 Here are some steps to wire or install an RV solar system. Mount the solar panels to the RV roof in series or parallel. then connect the charge controller to the RV battery bank. You can connect wires from the solar panels to the charge controller using a circuit breaker. Steps for connecting RV solar panel to your batteries: 1: Mount your solar panels on the roof of your RV. 2: Mount your charge controller inside the RV as close to your batteries are possible 3: Run your wiring from the solar panels into the RV and over to the charge controller.
Method of wiring the RV solar panel system:
Monitoring and controlling of RV solar panel system:
You can monitor the output of your solar panels with a solar monitoring system. Typically, solar monitors are deployed concurrently with solar panel installations. In addition, there are aftermarket solar monitors, some of which double as energy monitors for homes. One should employ PV module monitoring systems using software (phone apps or web portals) to maintain and maximize energy production. Variations in sun radiation and meteorological data will also be detected by the technology in this system. Switches The most crucial variables to keep an eye on are temperature, light intensity, and current.
Install and maintain of RV solar panel system:
- Plan and design: Measure the available roof space and plan the layout of your solar panel system.
- Mounting: Install the mounting brackets securely on your RV’s roof
- Wiring and connections: Depending on the required system voltage, connect the solar panels in parallel or series.
Now let’s check out your checklist!
- Create a maintenance checklist
- Record Solar power Generation
- Review the Manufacturer’s Solar Panel maintenance guidelines
- Check Electric Solar wiring every 6 month
- Inspect your solar panel monthly
- Tighten Bolts and screws
- Examine your roof as part of your solar panel upkeep.
Process
- Set up scaffolding
- Install solar panel mounts
- Install the solar panel
- Wire the solar panel
- Install solar inverter
- Bond solar inverter and solar battery
- Connect the inverter and solar battery
- Connect the inverter to the consumer unit
- Strat and testing solar panels
Safety Precautions of RV solar system :
- Ensure that the space beneath your solar panels is uncluttered, transparent, and devoid of anything. When building a PV system, watch out for falling objects and never toss anything up or down. When solar panels are first unpacked, they should be covered with an opaque sheet to avoid heat or energy buildup.
- Make sure your body is dry
- Never use broken equipment
- Always turn off the Mains first
- Use rubber gloves
- Don’t use steel ladders
Remember, you may calculate the approximate number of 100-watt solar panels you require by dividing your daily energy use by 350. Let’s examine the earlier instance you gave. You will require at least five 100-watt solar panels if your daily consumption is estimated to be 1,755 watt-hours (1,755/350=5).
RV solar Charging System components:
- Solar panels: these devices gather solar energy and transform it into electrical power.
- Solar charge controller
- Battery bank
- Battery Monitoring System
- Wiring cutoff Switches and fuses
- Power inverter
Types of RV solar panels:
- Monocrystalline
- Polycrystalline
- Thin-film
Components of Solar System:
- Inverter
- Racking
- Panel
- Solar battery storage unit
- Solar photovoltaic cells
- Toughened Glass-3 to 3.5mm thick
- Encapsulation- EVA Film layers
- polymer rear back sheet
- junction box diodes and connectors
Pros:
- The quiet and easy-to-use solution. One of the primary benefits of solar power is the ease of use and absence of noise pollution
- Extended Time Boondocking
- Enhanced battery life
- Low- maintenance solution
Cons:
- Solar doesn’t function on all kinds of roofs.
- Solar is not ideal if you are about to move
- Low electricity costs low savings
- Upfront costs can be high
- Solar panels do not work at night
- Solar panels sometimes contain toxic metals
- Selecting the best installation can be difficult.
FAQ
How many batteries do I need for 3000 watt solar?
If the battery banks you want to purchase are also 50Ah you will need six of them for a 3000-watt inverter.
Do I need a controller to charge a battery from solar panel?
Solar charge controllers are an essential element to any solar electric panel system.
How long do solar battery banks last?
Solar batteries last between 5 to 25 years.